This blog post provides step-by-step guidance on how to install a stair handrail using the epoxy structural adhesive, Belzona 7311.

What is the Epoxy Structural Adhesive, Belzona 7311?
Belzona 7311 is a fatigue resistant epoxy structural adhesive, optimised for structural bonding applications requiring high mechanical strength, cleavage and shear resistance. Belzona 7311 is ideally suited for bonding applications subjected to cyclic and repeated load.
Key Benefits of Belzona 7311:
- High resistance to cyclic fatigue and peel/cleavage forces
- Excellent adhesion to metallic substrates
- Suitable for dry or wet service between -30°C (-22°F) and 60°C (140°F)
- Cold-curing, solvent free material keeps application environment safe
- Easy to mix and apply without specialist tools
Step-by-Step Guide: How to Install a Stair Handrail
Step One: Surface Preparation Prior to Application of Belzona 7311
The first step prior to the application of Belzona 7311 is surface preparation. Grit blast the mating faces to the requirements of SSPC SP 10 or ISO 8501- SA 2 ½ cleanliness with a minimum average 75-micron (3 mils) profile. Use tape to mask the repair area and prevent excess product on the structure.

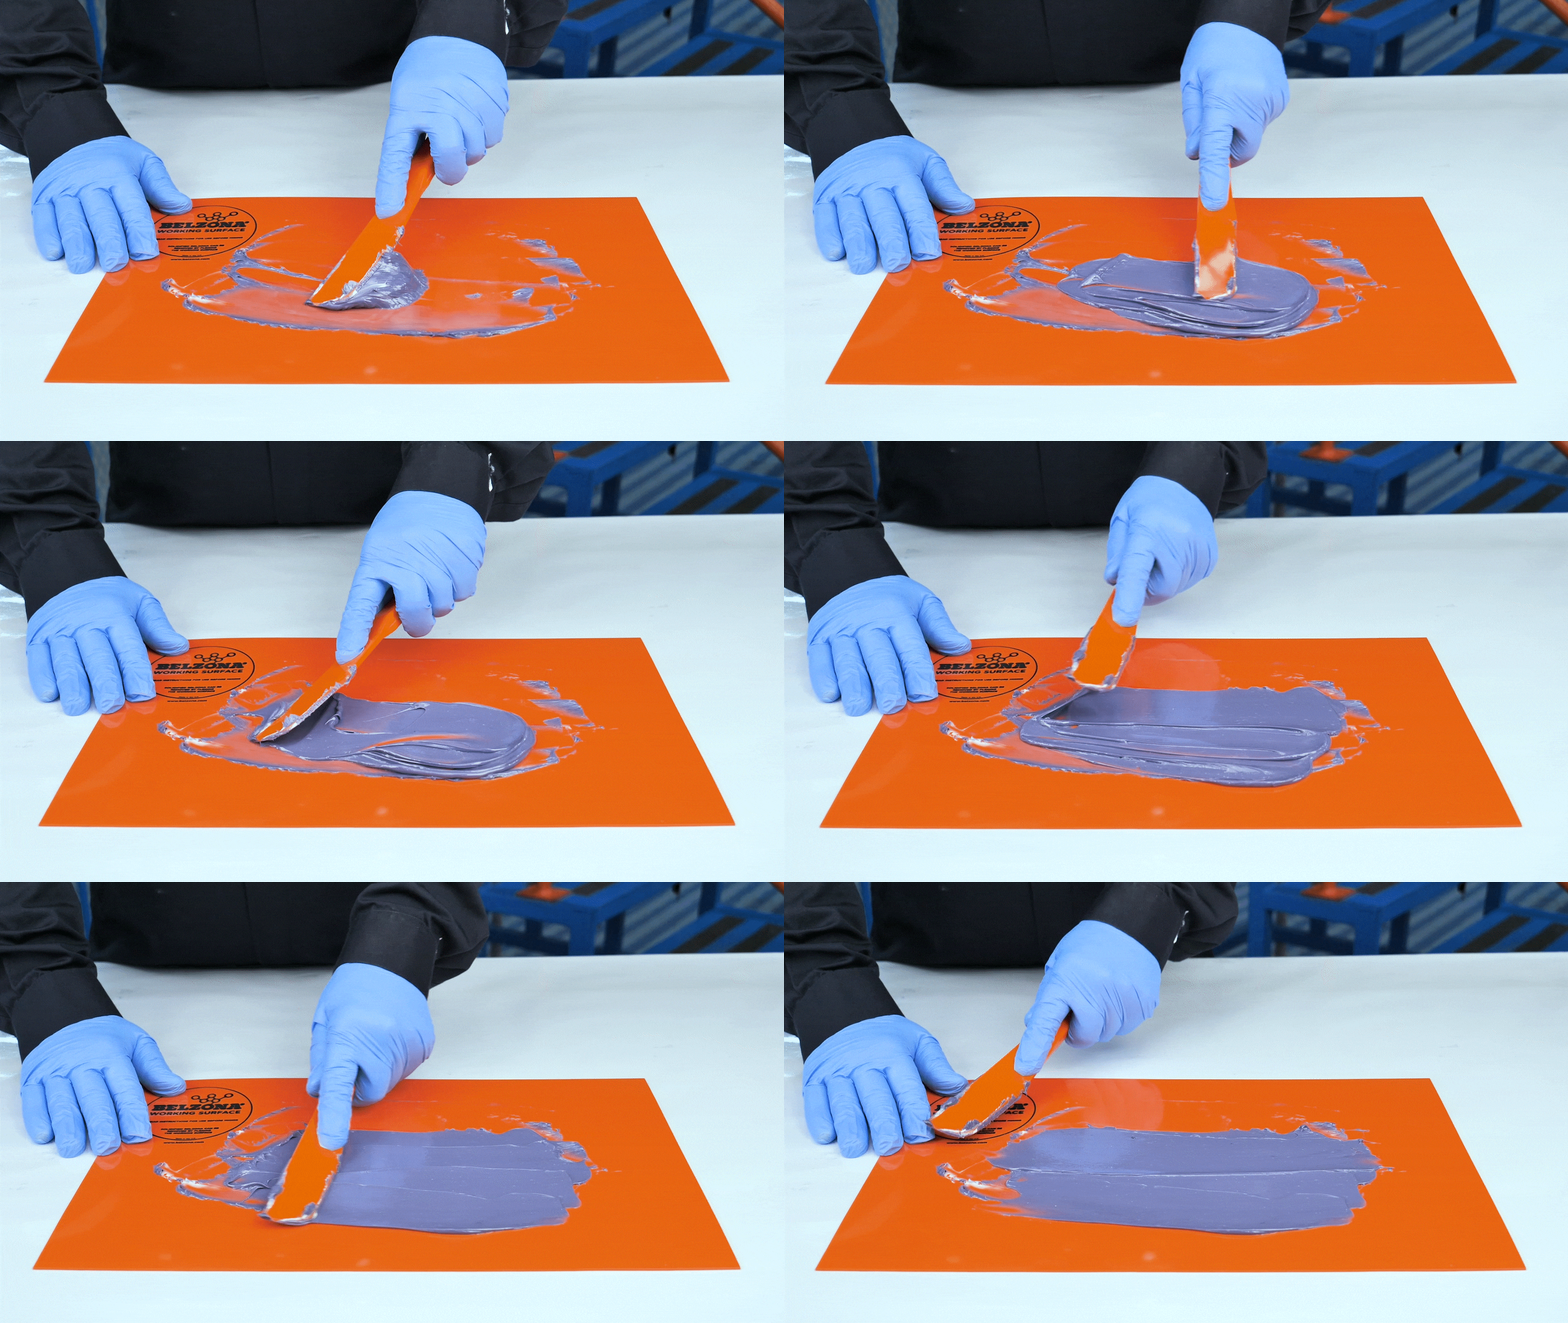
Step Two: Mixing the Epoxy Structural Adhesive
The epoxy structural adhesive has a mixing ratio of 3:1 parts base to solidifier, both by weight and by volume, and is simple to mix due to its ‘soft paste’ properties. Simply mix the components using a Belzona spatula in the recommended figure eight motion.

Using the same spatula, score the mix for any remaining streakiness.
Step Three: Application of Structural Bonding System
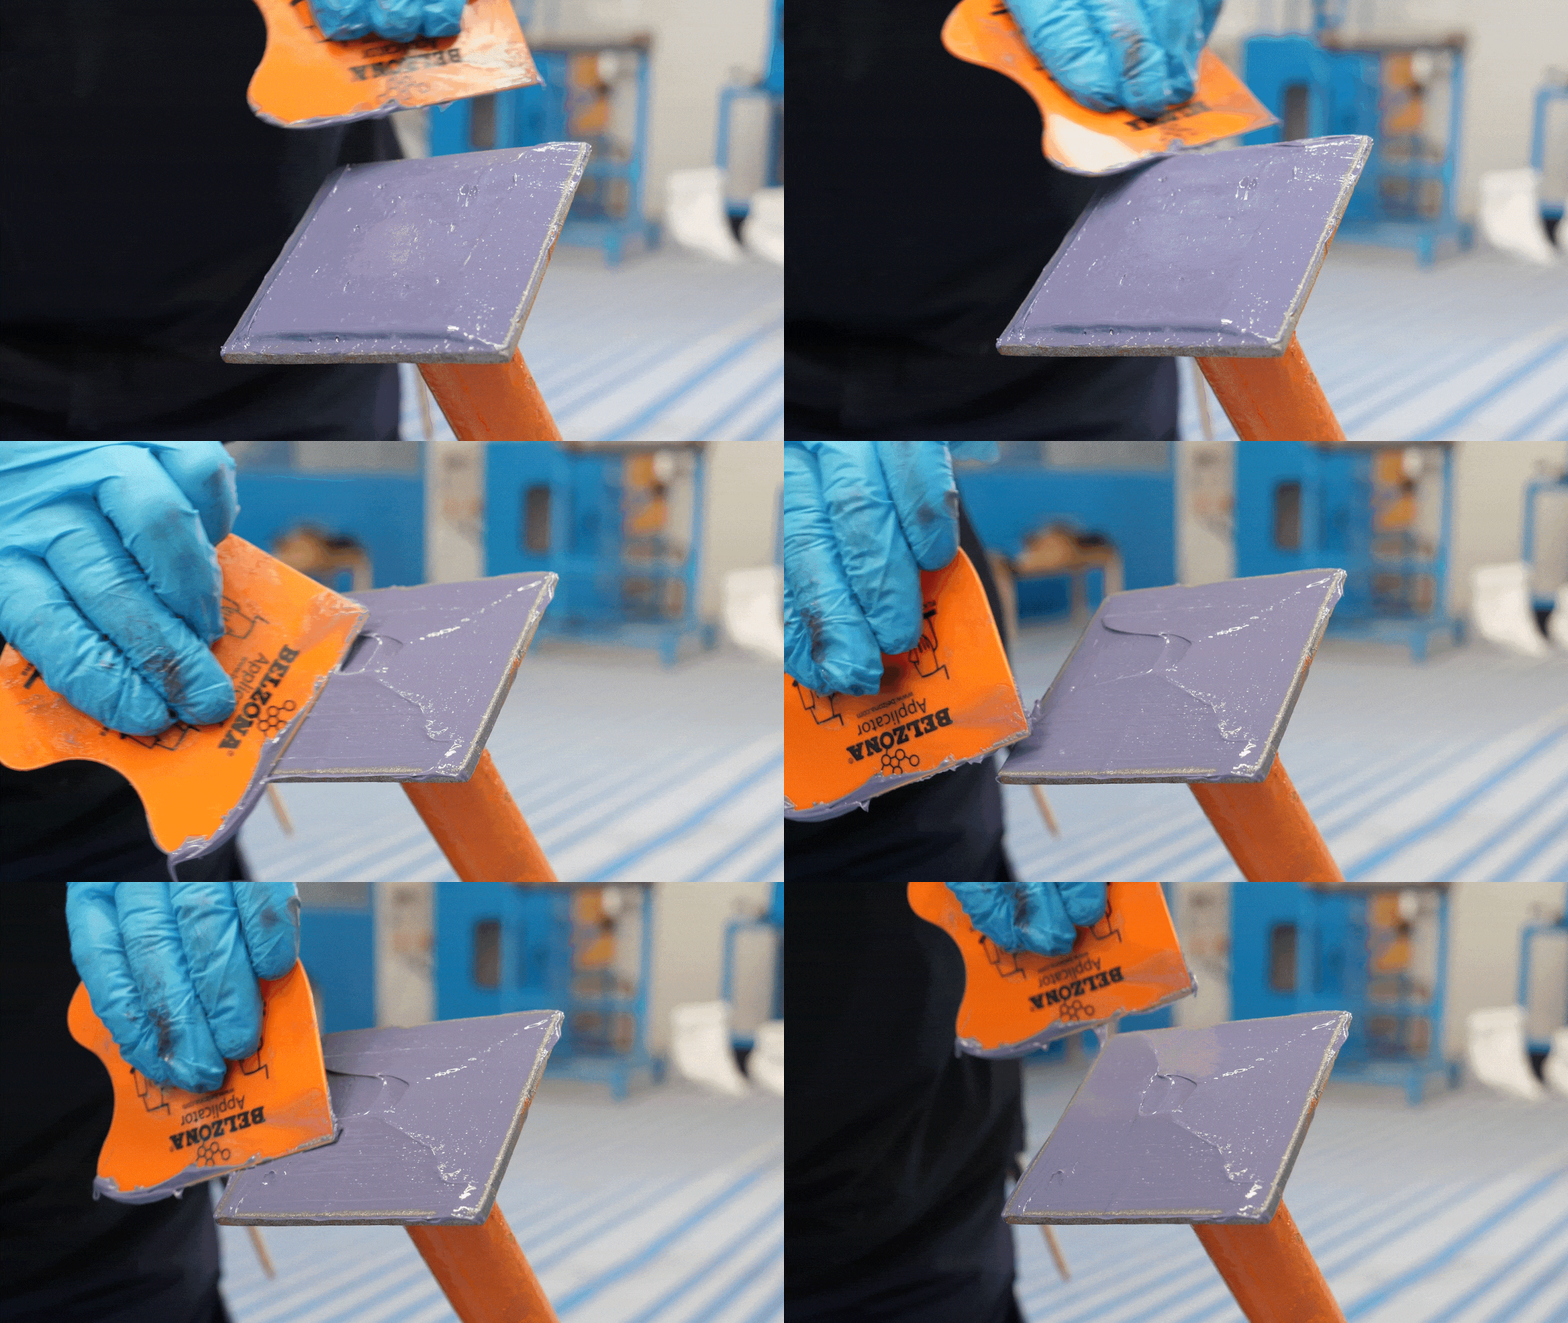
Apply the structural bonding system to both the base of the handrail and the structure using a short-bristled brush, ensuring it fully wets the profiled substrates.

Apply additional product to one of the mating faces creating a ‘peak’ build-up in the center. This reduces the potential for air entrapment within the bond line once both mating forces are pressed.
Step Four: Position the Handrail
Now that the product is applied, position the handrail on the stair set.
The mating faces are firmly pressed together until a maximum thickness of 2mm (80 mils) is reached. Use clamps/magnets/ratchet straps where possible to allow the product to extrude and ‘squeeze out’ any air pockets.

Step Five: Allow Belzona 7311 to Fully Cure
For the final step in the How to Install a Stair Handrail Guide, remove the tape. The product should be allowed to cure for full adhesive strength before any loads or stresses are exerted.

Video: How to Install a Stair Handrail with Belzona 7311
Click on the following link to read the Belzona 7311 Instructions For Use document.
Frequently Asked Questions
What is the Belzona 7311 price?
Contact your local authorised Belzona Distributor to purchase Belzona 7311. To do this, visit the Distributor Finder page on Belzona’s website and use the contact details provided.
What applications can be carried out with Belzona 7311?
Applications for Belzona 7311 include:
– Vessel furniture: internal and external
– Equipment support
– Brackets handrails on steel substrates
– Staircases/ladders
– Plate bonding
What is the cure time of Belzona 7311?

Further Reading
Tank Leak Repair: A Complete Guide (with GIFs and Video)
How to Fix Uneven Concrete Floors (With Video)
Contact Your Local Distributor to Learn More About Belzona 7311

Having joined Belzona in 2010, Ian Wade has cultivated a deep expertise in corrosion, coatings, and inspection services. Currently serving as the Technical Services Manager at Belzona’s headquarters in Harrogate, Ian has held various roles. These include Technical Services Engineer and Training Facility Team Leader, where he managed the day-to-day operations of the training facility and collaborated closely with technical and business development teams.
Ian’s professional journey has taken him across the UK and international waters, including stints in South Korea, China, the North Sea, and the Caspian Sea, performing both supervisory and hands-on inspection work. His practical experience extends to on-site applications using Graco spray pumps and hand-applied coatings, directly enhancing operational standards and safety.
Ian is an AMPP (NACE) Certified Coating Inspector Level 2 and is currently advancing his knowledge by pursuing a Bachelor of Engineering in Mechanical Engineering part-time at The Open University, expected to complete in 2027. He has written a number of technical articles including: Strengthening the Bond with Reliable Structural Adhesives and The Benefits of Protecting Storage Tanks with Sprayable, Polymeric Coatings. His commitment to technical excellence and his robust experience make him a valued leader and innovator in his field.

