This blog post demonstrates how to stop a leak using Belzona’s repair composites for the short term and the long term.
Live leaks on pipes and tanks can be extremely damaging for facilities, resulting in lengthy downtime to allow for maintenance work, as well as the leakage of potentially hazardous substances into the surrounding environment.
Through-wall defects can be caused by internal and external corrosion, erosion, chemical attack, abrasion, and other deterioration mechanisms. If these processes are not controlled using Belzona materials, pipe and tank media can leak out, necessitating an immediate repair.
PART 1: How to Stop a Leak for the Short Term with Belzona 9611 (ES-Metal)
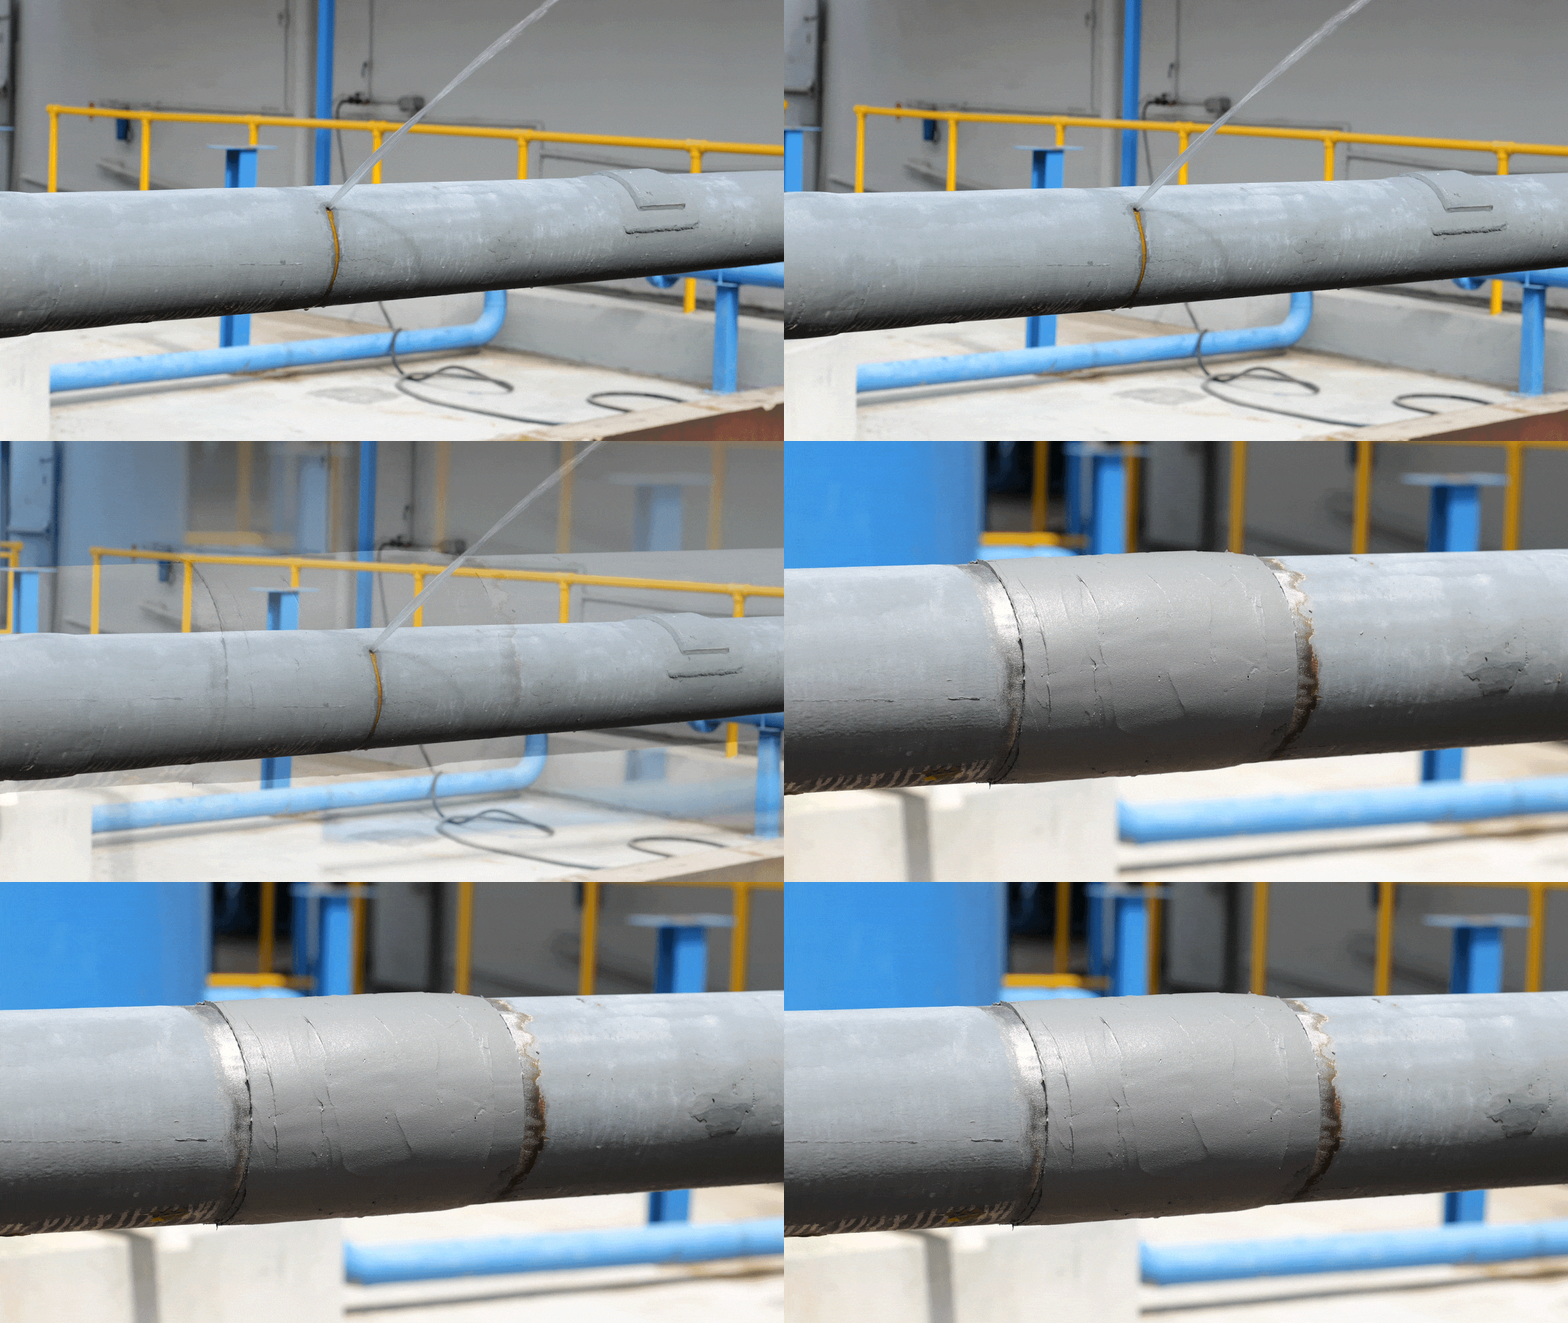
Part One provides a step-by-step guide on how to stop a leak using the rapid-curing putty system, Belzona 9611 (ES-Metal). It is a temporary leak fix that mitigates losses, limits damages, and provides a window for a permanent leak repair to be implemented.
STEP 1
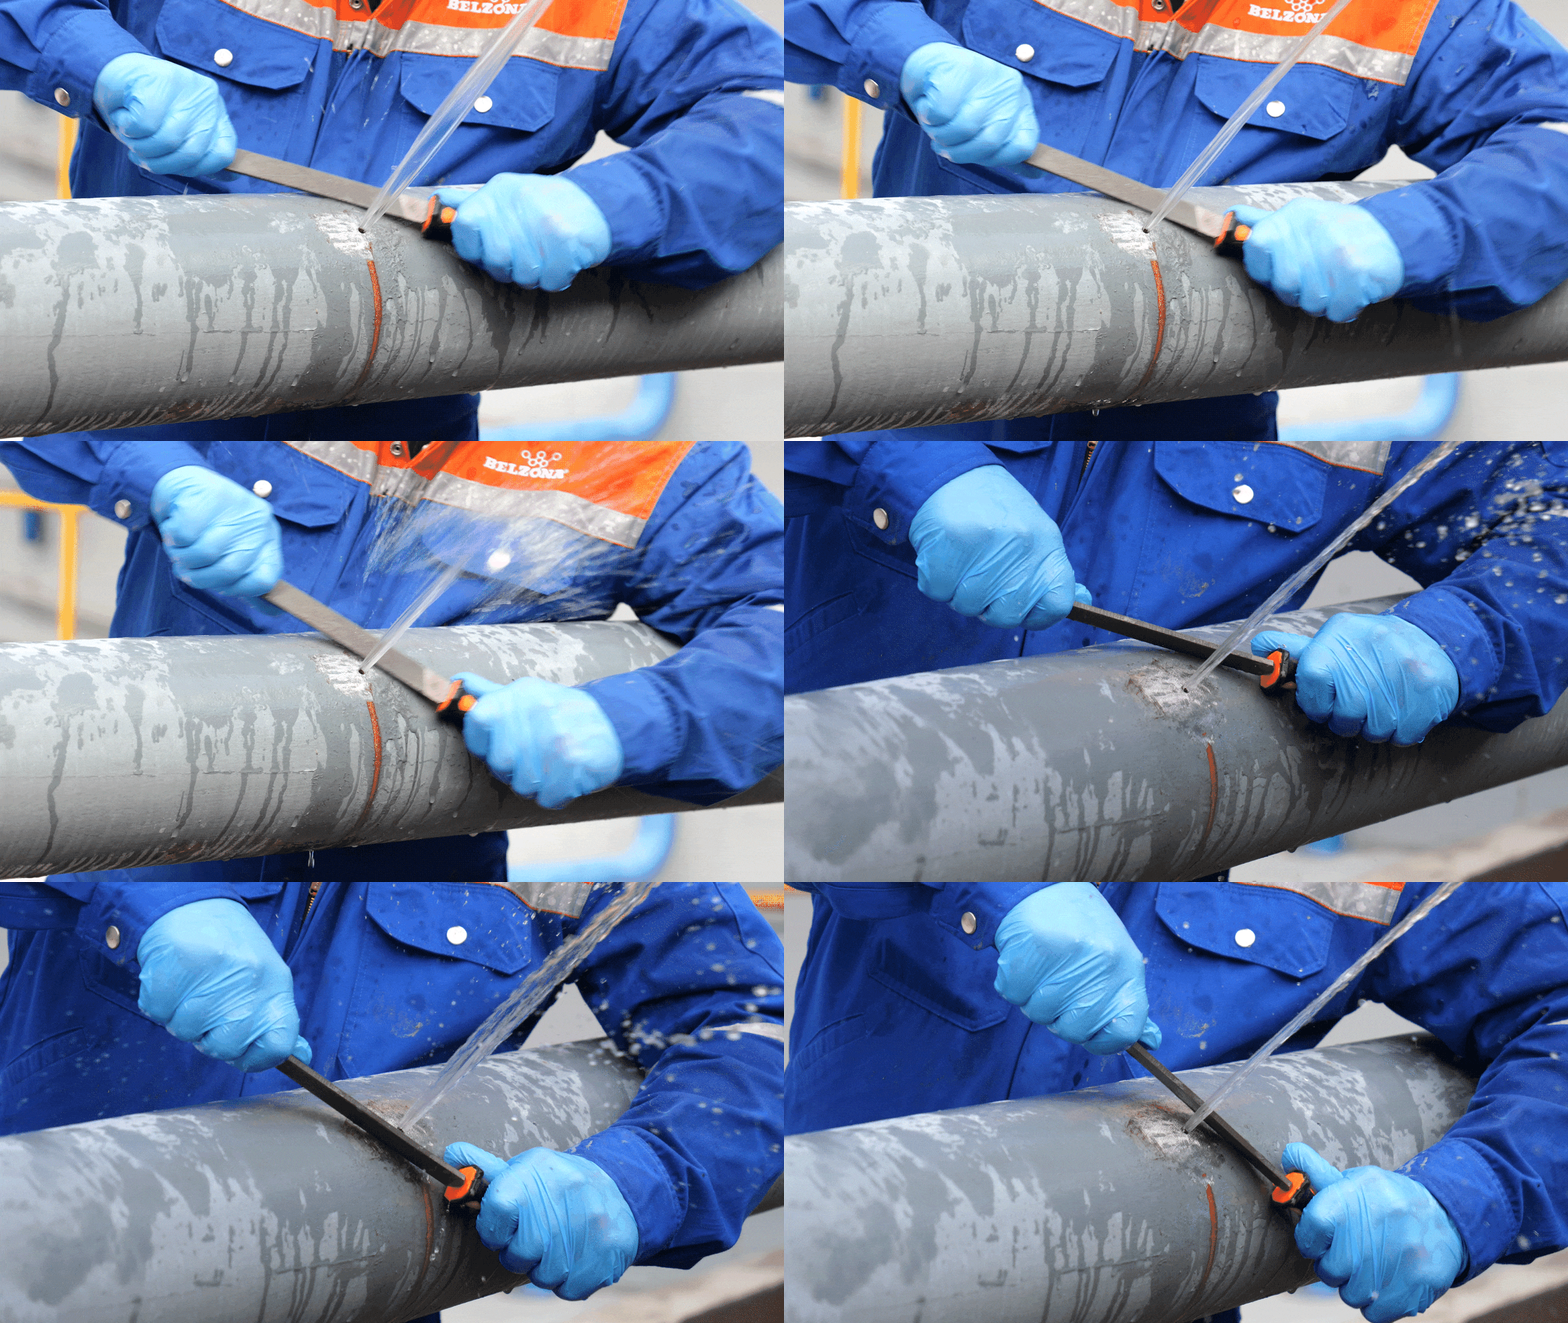
Firstly, the area around the leak must be roughened using a handheld surface preparation tool. The degree of possible surface preparation will depend on the particular circumstances of the leak, but a roughened surface will allow the Belzona 9611 (ES-Metal) to adhere better to the defect.
STEP 2
Once the best possible surface preparation has been achieved, the required quantity of Belzona 9611 (ES-Metal) must be kneaded by hand until a uniform grey colour is achieved.
STEP 3
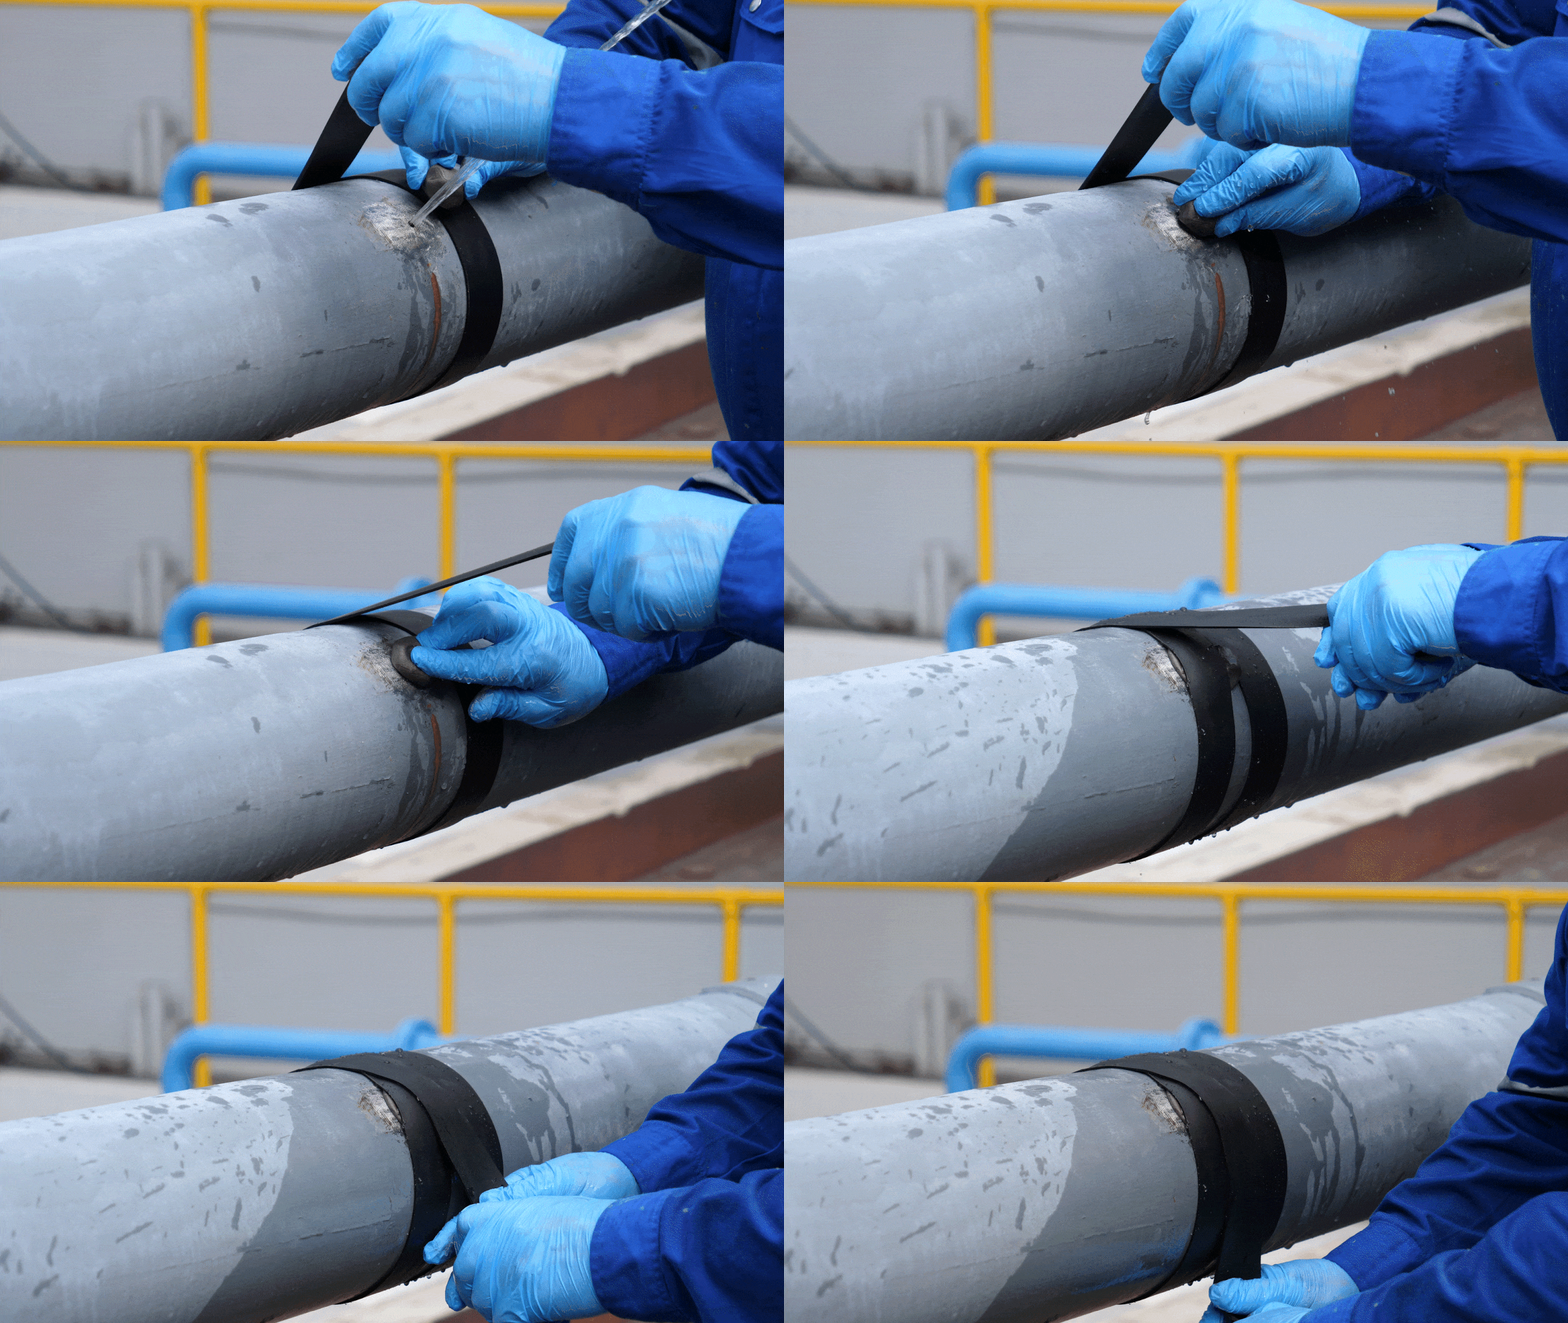
Once Belzona 9611 (ES-Metal) is mixed, force it into the defect and apply pressure until the pipe stops leaking. A Belzona tourniquet is ideal to hold the putty in place while it cures, applying continuous pressure for approximately an hour to ensure that the leak is plugged.
PART 2: How to Stop a Leak for the Long Term with Belzona 1212 and Belzona 9341 (Reinforcement Tape)
While Part One of this article demonstrates how to stop a leak for the short term, Belzona recommends that the emergency leak repair is overcoated with a composite material such as Belzona 1212 to provide better pressure retention and a more durable repair, as outlined in Part Two.
STEP 1
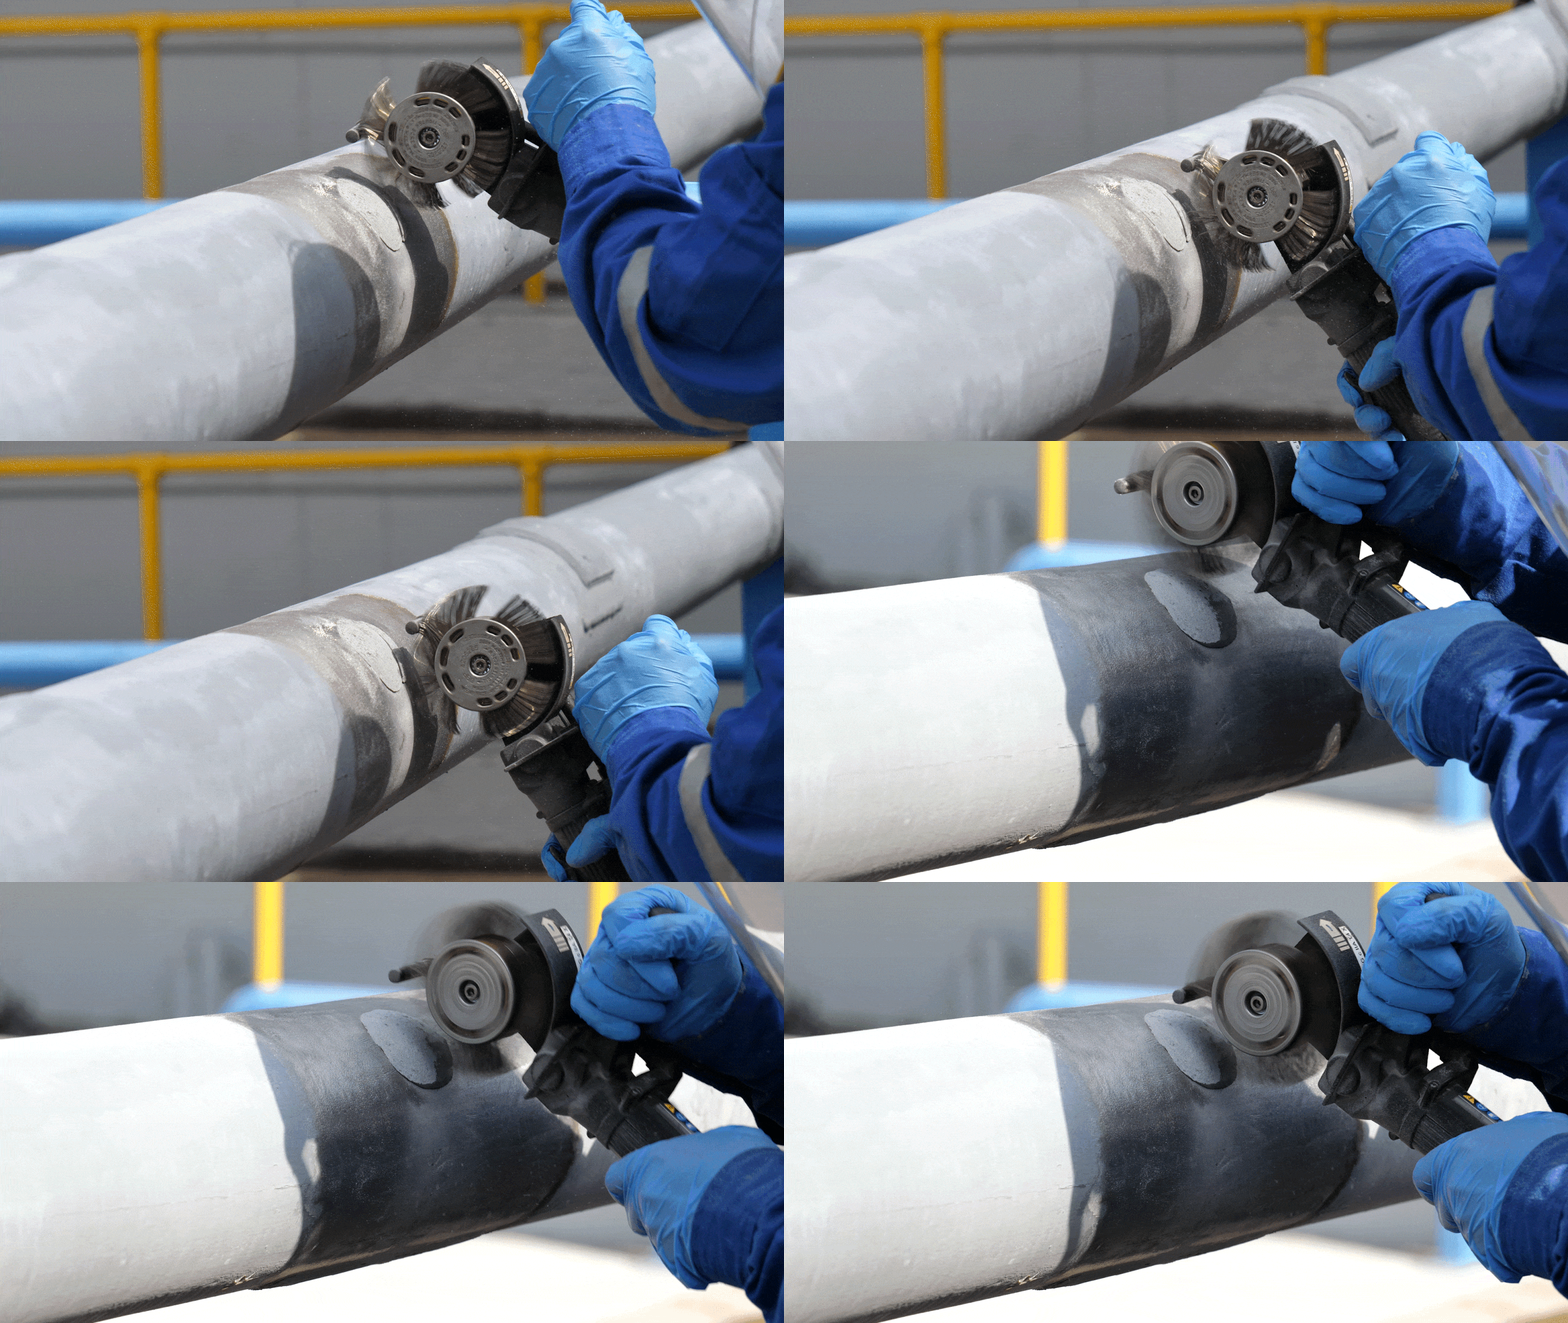
The surface should again be roughened using handheld surface preparation tools to allow the Belzona paste-grade product to adhere strongly to the emergency repair.
The surface should then be cleaned using Belzona 9111 (Cleaner/Degreaser) to remove contaminants from the surface profile.
STEP 2
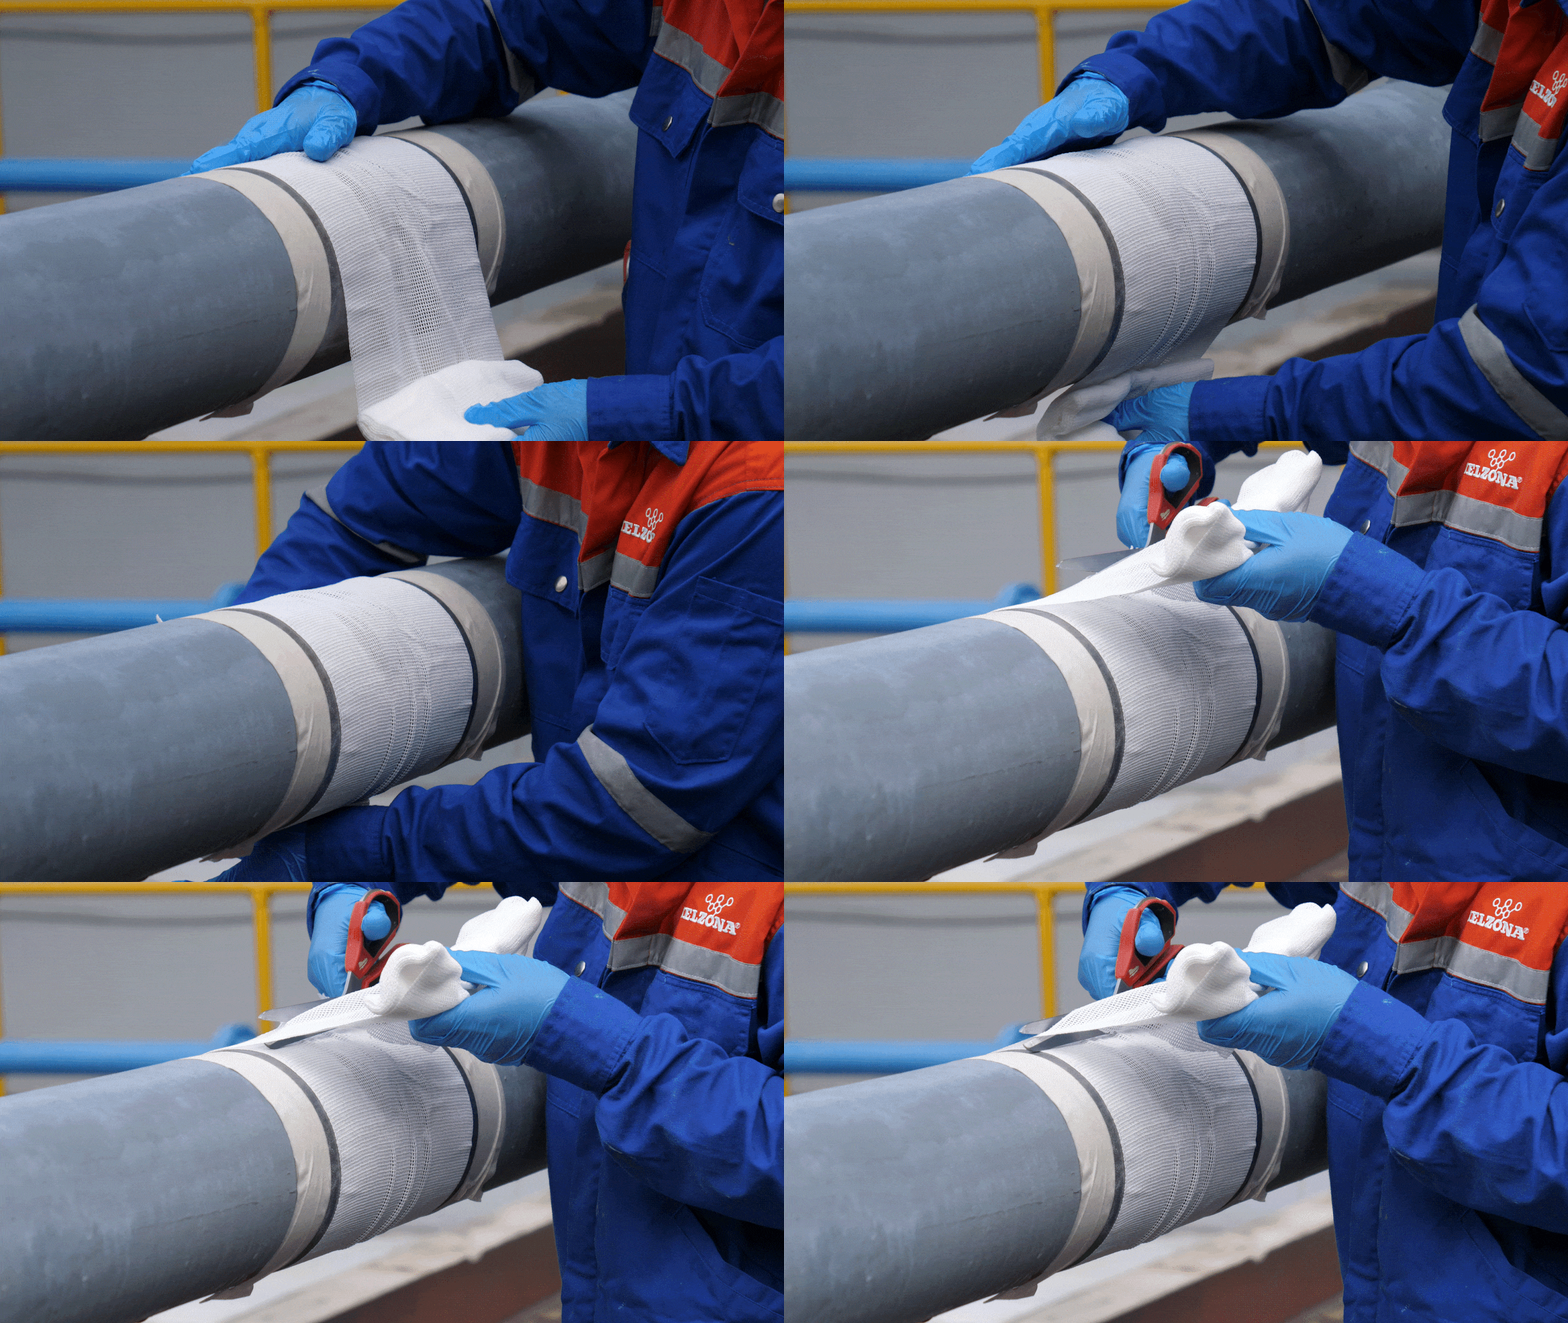
Dry measure the Belzona 9341 (Reinforcement Tape) around the repair area, ensuring that the length of the tape is at least twice that of the pipe circumference, and cut the appropriate measure.
STEP 3
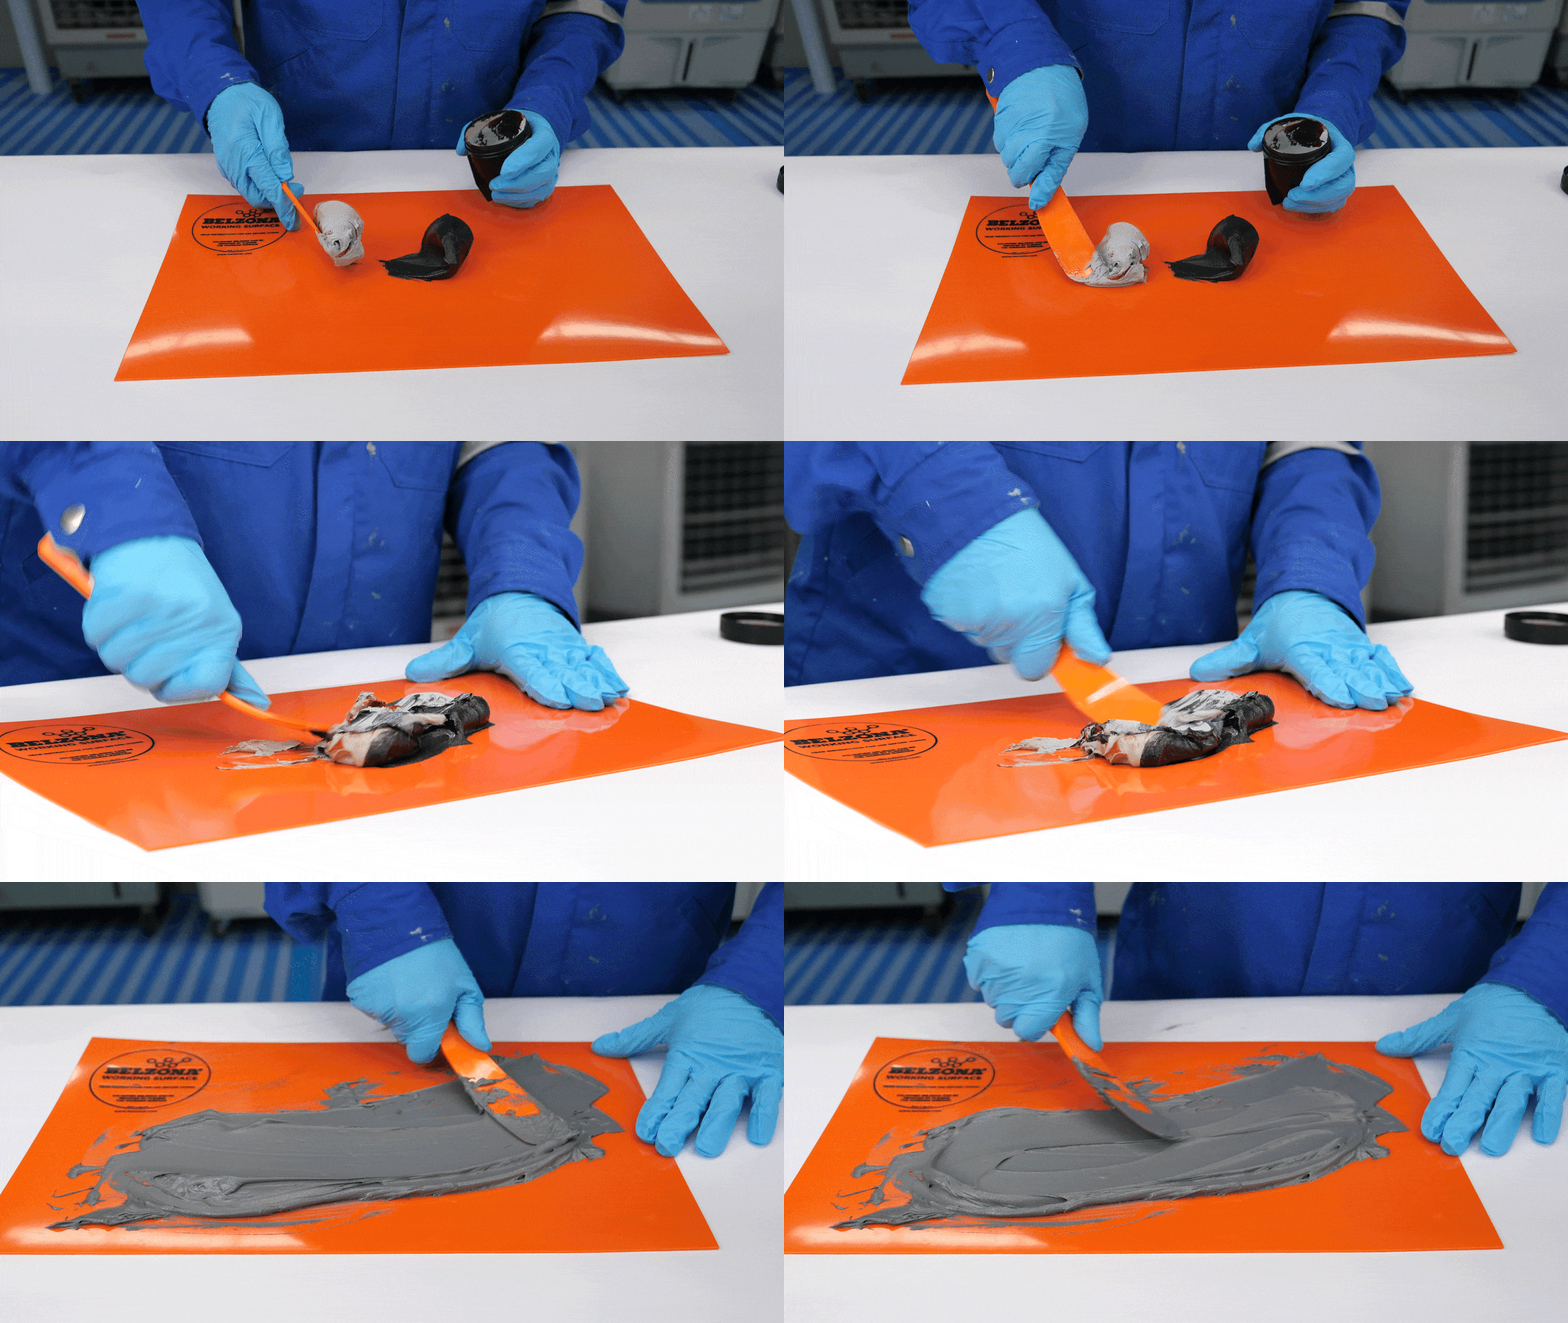
Mix the surface tolerant epoxy leak sealing product, Belzona 1212 at a ratio of one part base to one part solidifier by volume, or five parts base to six parts solidifier by weight, until a uniform, streak-free colour is achieved.
STEP 4
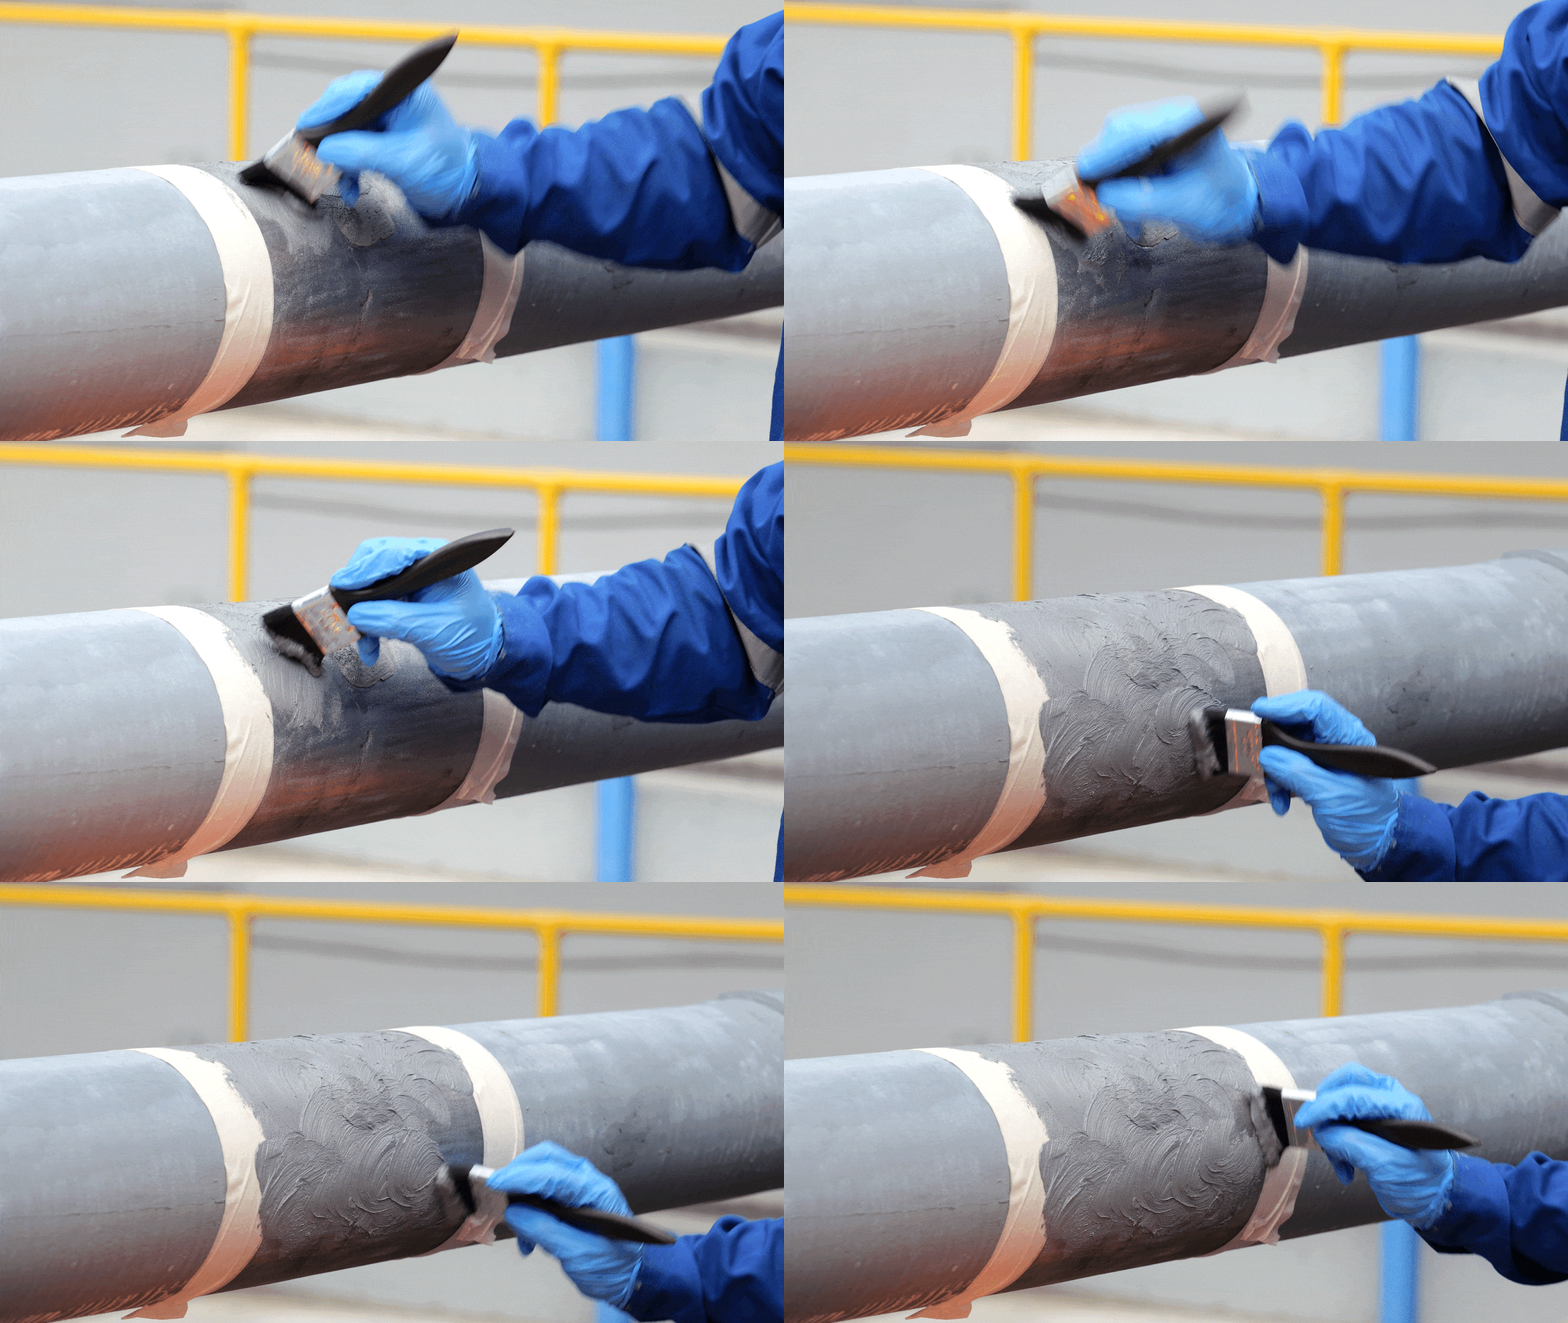
Apply a layer of the mixed product directly to the substrate, pressing hard with the brush to fill any crevices and ensure the maximum possible contact with the repair area. Wet out the Belzona 9341 (Reinforcement Tape) using Belzona 1212 so that one side is entirely coated. This step is essential when learning how to stop a leak effectively, as it ensures proper adhesion and durability.
STEP 5
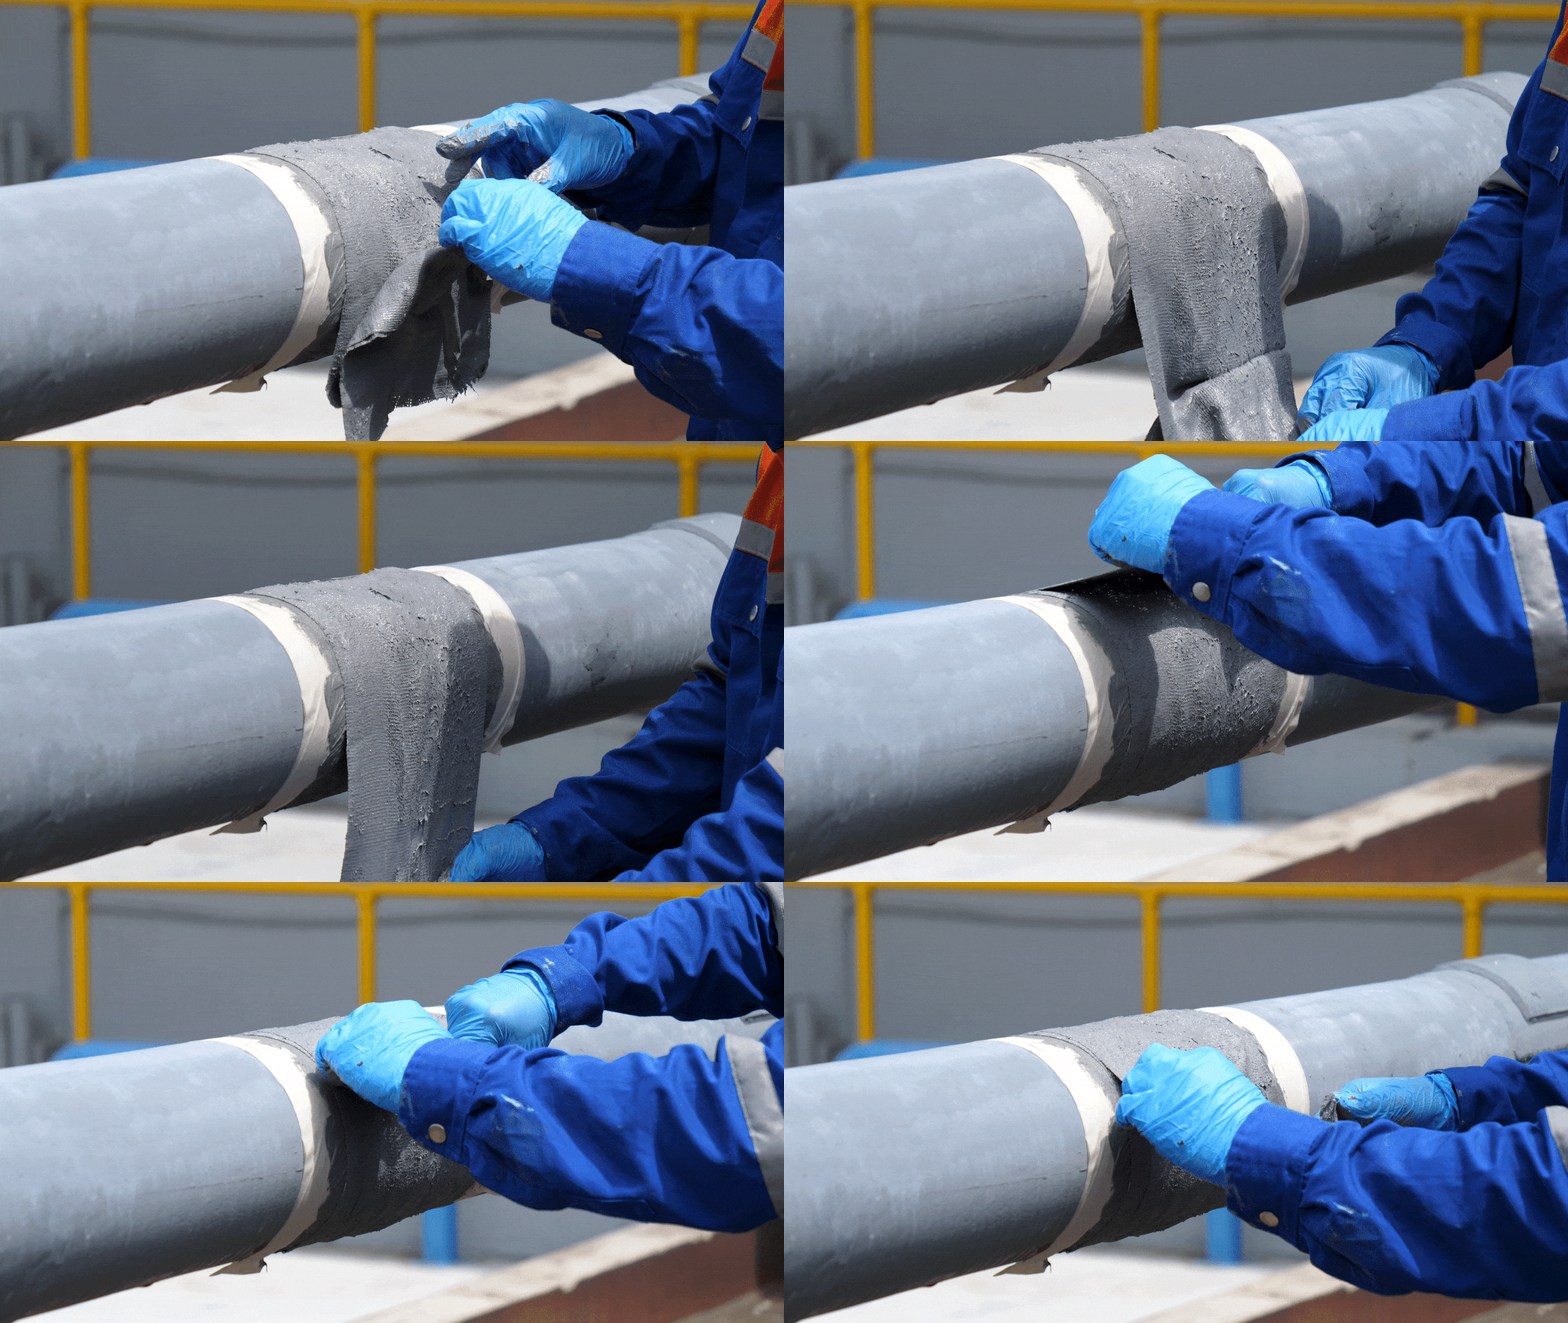
Wrap two lengths of the reinforced composite around the pipe circumference, ensuring at least 50% overlap, pulling tight to force excess product to the surface.
Once the repair area has been wrapped, ensure to smooth out any wrinkles, crevices or mounds of product, before overcoating with a final layer of Belzona 1212 to reinforce the repair.
By following the steps detailed above, live leak repairs can be instantly stemmed and quickly reinforced, providing equipment with a durable repair and a fast return to service.
Watch this video to see how to stop a leak in action:
WANT MORE INFORMATION ABOUT HOW TO STOP A LEAK?

Having joined Belzona in 2010, Ian Wade has cultivated a deep expertise in corrosion, coatings, and inspection services. Currently serving as the Technical Services Manager at Belzona’s headquarters in Harrogate, Ian has held various roles. These include Technical Services Engineer and Training Facility Team Leader, where he managed the day-to-day operations of the training facility and collaborated closely with technical and business development teams.
Ian’s professional journey has taken him across the UK and international waters, including stints in South Korea, China, the North Sea, and the Caspian Sea, performing both supervisory and hands-on inspection work. His practical experience extends to on-site applications using Graco spray pumps and hand-applied coatings, directly enhancing operational standards and safety.
Ian is an AMPP (NACE) Certified Coating Inspector Level 2 and is currently advancing his knowledge by pursuing a Bachelor of Engineering in Mechanical Engineering part-time at The Open University, expected to complete in 2027. He has written a number of technical articles including: Strengthening the Bond with Reliable Structural Adhesives and The Benefits of Protecting Storage Tanks with Sprayable, Polymeric Coatings. His commitment to technical excellence and his robust experience make him a valued leader and innovator in his field.

