Chemical attack is one of the costliest problems a storage tank can face. Acids, alkalis, solvents, and aggressive process fluids slowly eat through linings, steel, and concrete until a tank weeps, leaks, or fails. The good news is that tank repair doesn’t have to mean cutting out sections, hot work, or ordering a new tank.
This guide explains how chemical attack damages storage tanks, the warning signs to look for, and a step-by-step process for restoring a damaged tank with cold-applied repair composites and chemical-resistant coatings. Along the way, we share real in-situ tank repair projects from Belzona’s case study library.
What Is Chemical Attack on Storage Tanks?
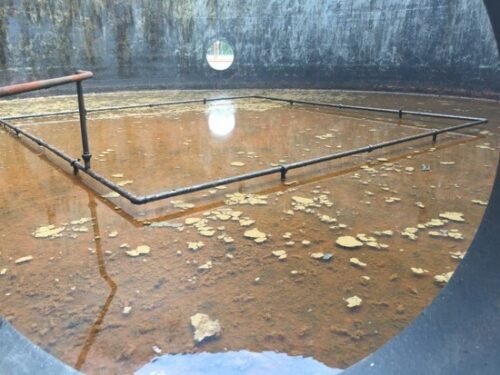
Chemical attack is the breakdown of a tank’s construction material through reaction with the substance it holds, or with that substance’s vapors. It looks different depending on what the tank is made of:
- Steel tanks: acids and other aggressive media dissolve the metal, causing pitting, general wall thinning, and, eventually, holes. Tank bottoms usually suffer first, because water and contaminants settle there.
- Concrete tanks: acids react with the cement paste, washing out the binder and leaving exposed aggregate, cracks, cavities, and loss of section. Even the vapors above the liquid line can do serious damage.
- Lined tanks (rubber, ebonite, GRP, epoxy): chemicals permeate the lining, which then blisters, softens, or disbonds. Once the lining is breached, the substrate underneath is exposed to direct attack.
How quickly damage develops depends on the chemical, its concentration, its temperature, and whether the surface is in full immersion, splash, or vapor service. Heat is a major accelerator: a lining that copes well at ambient temperature may fail quickly when process temperatures spike.
Signs Your Tank Needs Repair
The earlier you catch chemical attack, the smaller and cheaper the tank repair. During routine inspections, look for:
- Blistering, bubbling, cracking, or softening of the internal tank lining
- Discoloration or staining on the lining or the tank exterior
- Pitting or reduced wall thickness identified by ultrasonic testing
- Weeping or leaks at welds, seams, nozzles, and the shell-to-floor joint
- Spalling, exposed aggregate, or cracks in concrete tanks and bund walls
- Product contamination, which can signal that the tank lining has broken down
Any of these is a reason to take a closer look before a small defect turns into a through-wall leak, an environmental incident, or an unplanned shutdown.
How To Repair a Tank Damaged by Chemical Attack
Every tank repair is different, but a successful job follows the same sequence. Always work to the manufacturer’s instructions and your site’s safety procedures.
1. Identify the chemical and service conditions
Record exactly what the tank holds: the chemical, its concentration, operating and peak temperatures, and whether surfaces are exposed to immersion, splashing, or vapors. This information drives every material choice that follows. A coating that resists one acid at ambient temperature may not withstand exposure to another acid or the same acid at elevated temperatures.
2. Take the tank out of service and clean it
Drain the tank, then clean and decontaminate it so no chemical residue is left on the surface. Follow confined space entry and gas-freeing procedures before anyone enters.
3. Inspect and map the damage
Carry out a visual inspection and ultrasonic thickness testing to find pitting, thinning, and perforations. Mark every area that needs rebuilding and confirm the remaining structure is sound enough to repair.
4. Prepare the surface
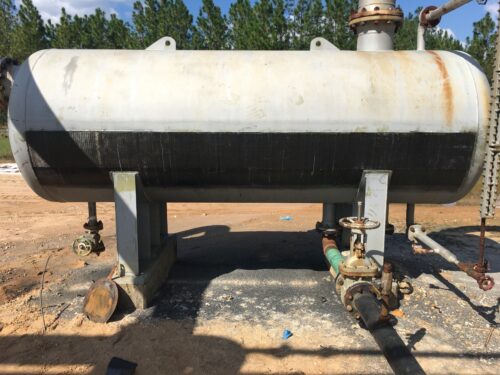
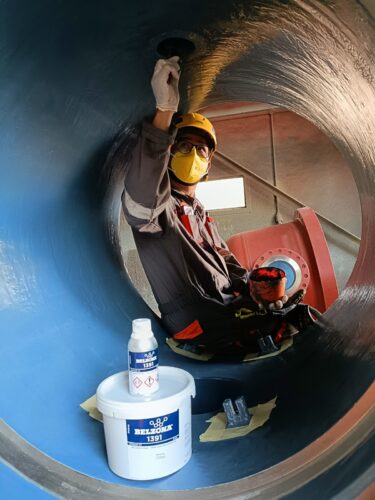
Effective surface preparation is essential to the long-term performance of the repair. Remove the failed lining and abrasive blast the steel to a clean finish with an angular profile. In this Slovakia tank bottom project, for example, the steel was blasted to Sa 2½ with a 75 μm (3 mils) profile, then degreased. Concrete surfaces need high-pressure cleaning, scraping, and blasting to sound material.
5. Rebuild lost metal or concrete
Fill pitting and rebuild thinned areas to their original profile with an epoxy metal repair composite such as Belzona 1111 (Super Metal). Where the steel is perforated, bond a doubler plate over the hole, as was done in this UK process water tank. In concrete tanks, condition deep cavities, then rebuild them with an epoxy repair mortar such as Belzona 4111 (Magma Quartz), as seen on this pre-treatment plant tank in Poland.
6. Apply a chemical-resistant lining
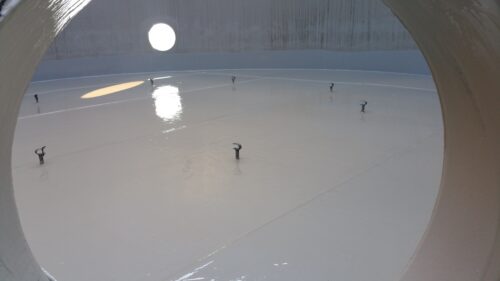
Seal the repaired surface with a coating matched to the chemical and temperature recorded in step 1. Options include immersion-grade epoxies such as Belzona 5811 (Immersion Grade), high-temperature coatings such as Belzona 1391T, and chemical-resistant systems such as Belzona 4311 (Magma CR1) for acids and alkalis. Apply the specified number of coats at the specified thickness.
7. Cure, inspect and return to service
Allow the system to cure fully before refilling. Some coatings benefit from heat curing, as seen on the Slovakia project outlined above. Check film thickness and test the lining for pinholes before the tank goes back into service, then add it to your regular inspection schedule.
Why Cold-Applied Tank Repair Avoids Hot Work
Traditional tank repair often means welding in new plate. On a tank that has held flammable or reactive chemicals, this introduces additional safety requirements, including hot work permits and fire watches, as well as the risk of igniting residues. Welding also heats the surrounding steel, which can distort thin sections and change the metal’s properties. On the Slovakia project, the team judged that welding would have taken longer and thermally affected the steel around the repair.
Cold-applied polymer repair systems avoid these problems:
- No hot work: no ignition source, no heat-affected zone, and no distortion
- Less downtime: repairs are often finished in situ within hours or days, not weeks
- Bonds to many substrates: steel, concrete, GRP and FRP can all be repaired and protected
- Repair and protection in one system: the same repair system rebuilds lost material and seals it against further attack
You can see the full range of options on Belzona’s industrial tank repair page.
Protecting Secondary Containment and Bunds
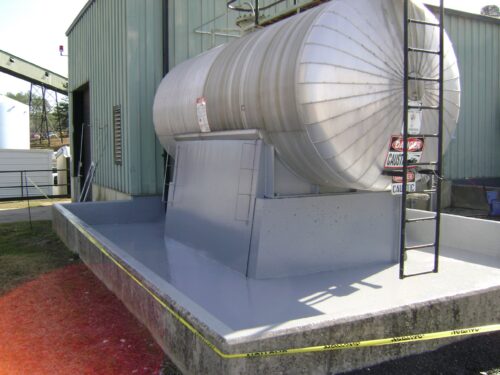
A comprehensive tank repair should also consider the condition of the surrounding secondary containment. Bunds and containment areas exist to hold spills, so they take the same chemical attack as the tank whenever there is a leak or overflow. Unprotected concrete can deteriorate rapidly and start to crack, and a deteriorated bund lining can’t do its job.
Rebuild damaged concrete with a high-strength epoxy repair mortar, then seal the whole area with a chemical-resistant coating. Belzona 4311 (Magma CR1) and Belzona 4341 (Magma CR4) protect against a wide range of acids and alkalis, including at high temperatures. Learn more on Belzona’s storage tank and secondary containment page.
Restore Your Tanks Without Replacing Them
Chemical attack doesn’t have to end a tank’s working life. With the right preparation, repair composites, and chemical-resistant lining, a damaged tank can be returned to service quickly, safely, and at a fraction of the cost of replacement. The key is acting early and matching the repair system to the chemical you store.
Video: How to Repair A Tank Live Leak
Facing a tank repair? Contact your local Belzona Distributor for an on-site assessment and a repair solution tailored to your tank, your chemicals, and your shutdown window.
Tank Repair FAQ
Yes. Cold-applied epoxy repair composites can rebuild pitted and thinned steel, and doubler plates can be bonded over perforations instead of welded. A chemical-resistant coating then protects the repair. This avoids hot work entirely.
It depends on the size of the tank and the extent of the damage. In Belzona case studies, repairs have taken from under 24 hours to three or four days, compared with seven to 15 days for replacement.
A tank leak at the base often starts at the shell-to-floor joint, where water and chemicals collect and attack concentrates. Industrial tank repair here usually has two stages. First comes tank leak repair: clean and blast the area, rebuild corroded steel with an epoxy repair composite, and bond a plate over any perforation. Then comes tank base sealing: a flexible sealing system around the shell-to-floor joint keeps moisture and chemicals out while allowing for the tank’s natural movement. See Belzona’s industrial tank repair solutions for more.
Yes. Damaged concrete is cleaned and blasted back to sound material, cavities are rebuilt with an epoxy repair mortar, and the surface is sealed with a chemical-resistant coating.
The right coating depends on the acid’s concentration and temperature. In one Belzona project, a system based on Belzona 1392 (Ceramic HT2) was chosen because it resists 30% sulfuric acid. Additionally, Belzona 4311 (Magma CR1) is available as an option, as it can resist up to 98% sulfuric acid. Always check chemical resistance data for your specific service conditions.

Digital Content Creator, Belzona Inc., Miami, Florida