Riveted Tank Leak
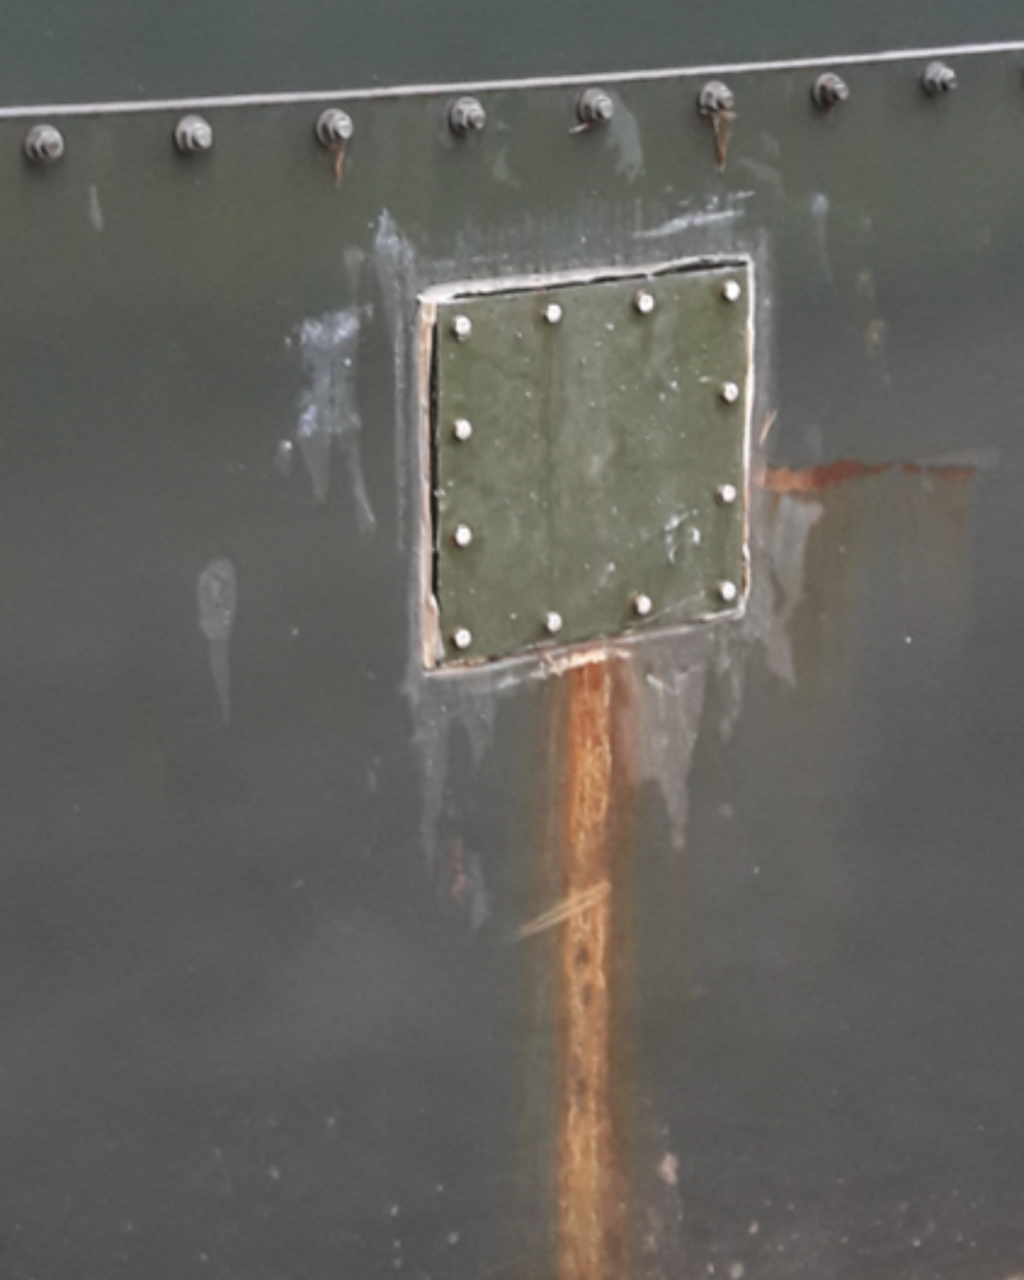
Riveted tanks are storage containers constructed by joining overlapping metal plates with rivets, securing the seams without welding. Riveting can also be used to attach repair patches to industrial tanks, typically incorporating a suitable sealant or gasket to prevent leakage. Over time, corrosion can damage the rivets and surrounding plates, compromising the integrity and tightness of the joints.
- Crevice corrosion: may occur at the lap joints, where moisture seeps through the gaps between overlapping plates.
- Galvanic corrosion: may occur where dissimilar metals are in contact, such as rivets made from a different metal than the tank plate.
In addition, cyclic loading can cause joint movement, rivet loosening and fatigue cracking, potentially leading to leaks at the lap joints. Where sealants or gaskets are used, deterioration of these materials can also result in leakage.
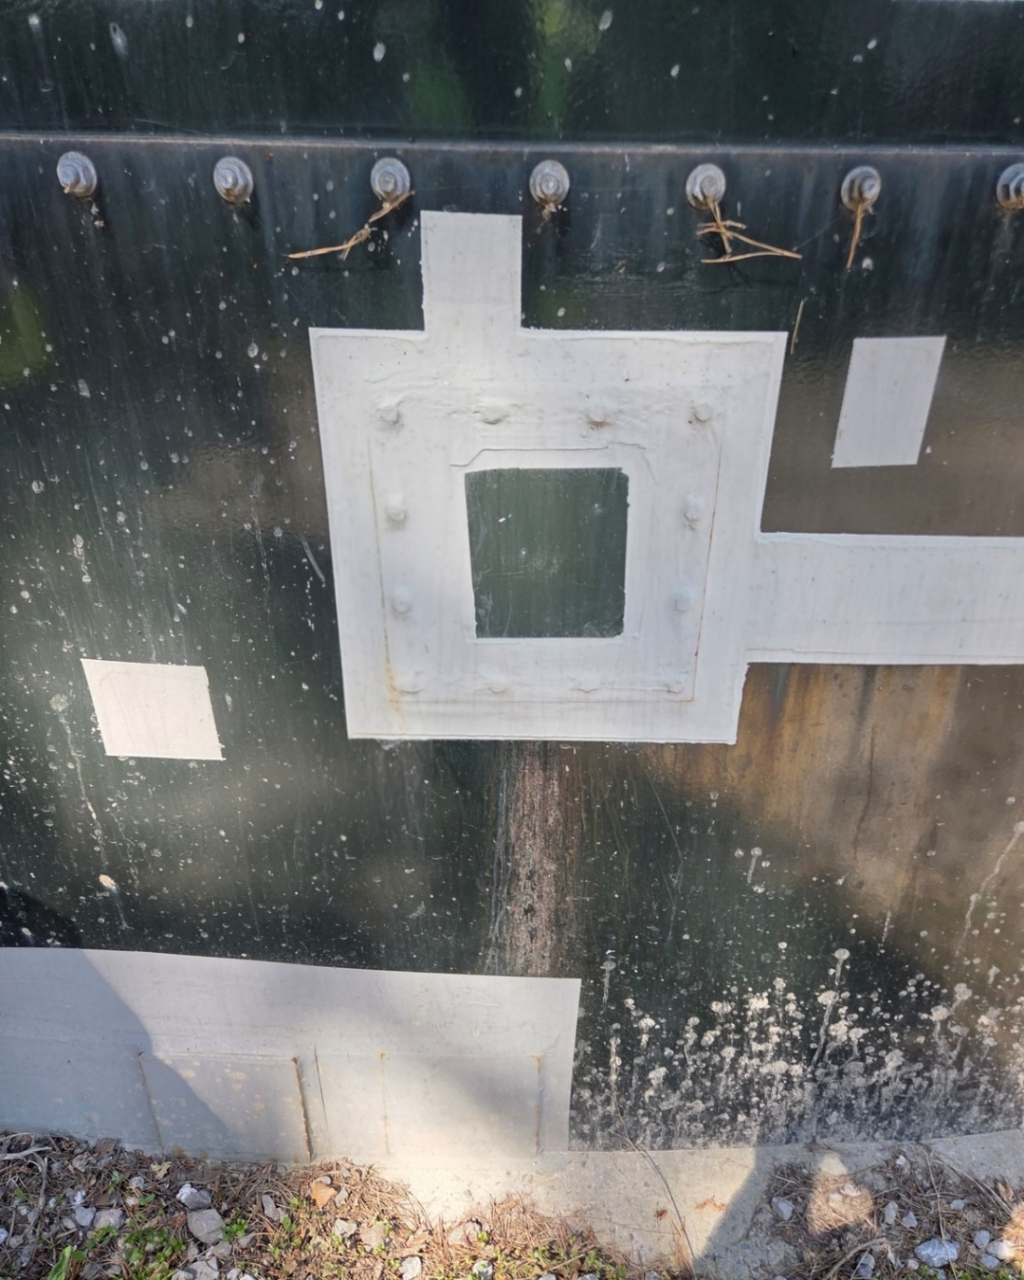
How to Apply a Cold-Bonding Adhesive for Riveted Tank Leak Repair
This blog post explains how to repair leaks on the exterior of a riveted water tank using Belzona 7311, a fatigue-resistant adhesive for structural bonding applications requiring high mechanical strength, cleavage, and shear resistance. By using a cold-bonding solution instead of welding for tank leak repair, asset owners can mitigate the need for hot work, reduce risks of sparks and help create a safer work environment on-site.
To begin, lower the liquid level of the tank below the leak area or use Belzona 9611 (ES Metal) to temporarily stop the leak in the riveted tank.
Step 1: Identify and Dry the Repair Area
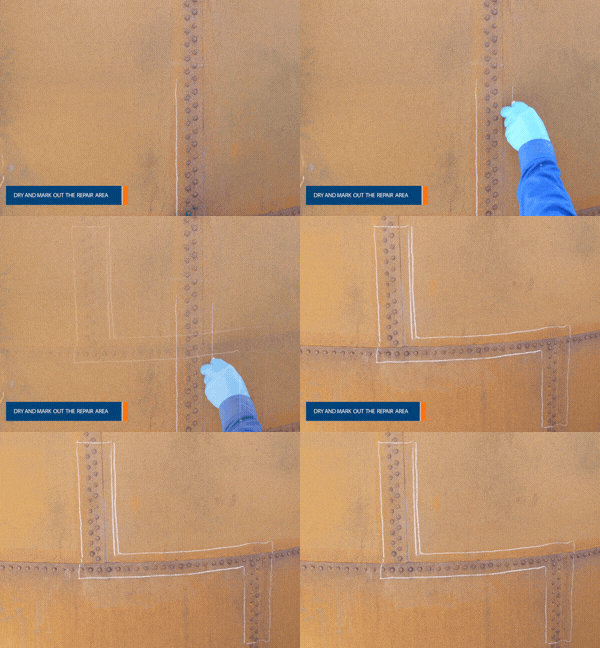
After lowering the liquid or temporarily stopping the leak, make sure the repair area is completely dry. Then, mark out the section requiring the repair to prepare for the following surface preparation step.
Step 2: Surface Preparation
Use a hand-held power tool to prepare and clean the surface to achieve an SSPC-SP 11 bare metal standard with a minimum profile of 25 µm (1 mil). Take care to remove all rust, corrosion products and loose material. For optimum adhesion, ensure that areas between the rivets receive a uniform treatment.
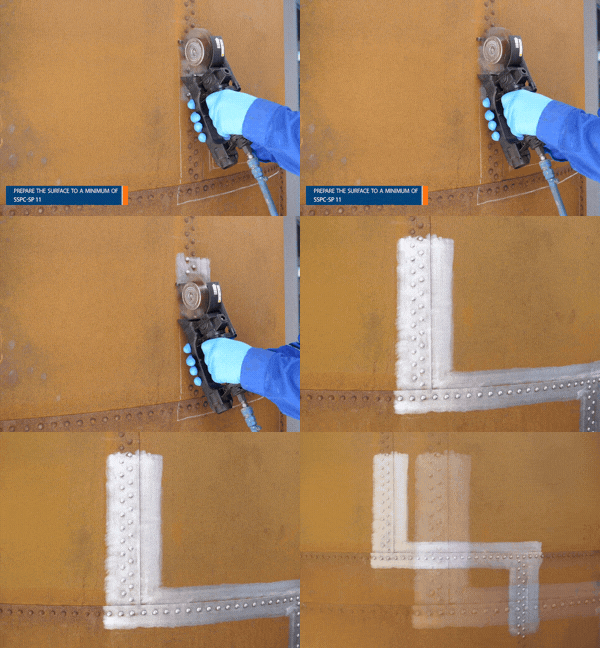
Step 3: Degrease with Belzona 9111 (Cleaner/Degreaser)
Brush away loose contaminants and apply Belzona 9111 (Cleaner/Degreaser) to degrease the repair area. Allow the surface to dry completely. Consult the manufacturer’s Instructions for Use for the drying time.
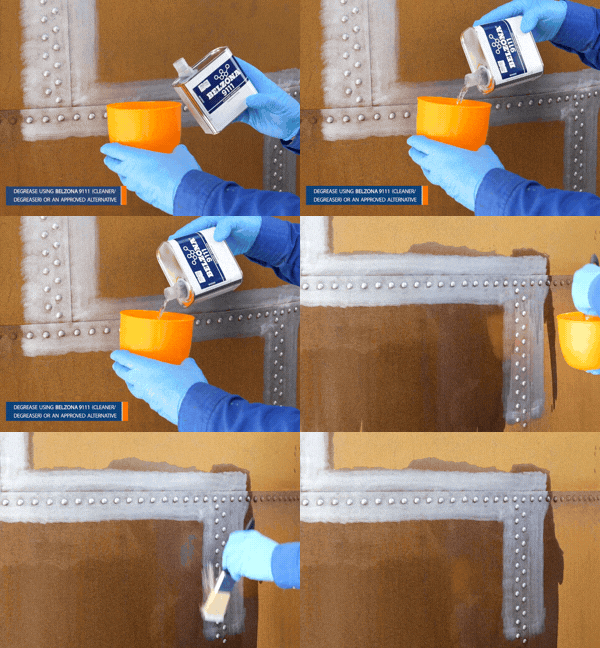
Step 4: Mark the Repair Area
Use masking tape to mark the target repair area within the prepared surface of the riveted tank. This step ensures a clean finish and keeps the material within the prepared repair zone.
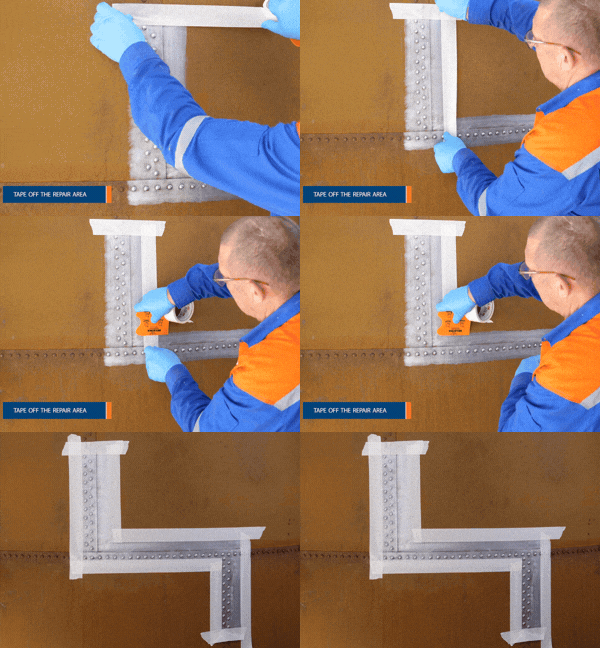
Step 5: Mix Belzona 7311, a Fatigue-Resistant Structural Adhesive
Mix Belzona 7311 according to the manufacturer’s Instructions for Use. The mixing ratio of Belzona 7311 is 3:1 (Base:Solidifier) by volume. Mix thoroughly to achieve a uniform colour, free of any streakiness.
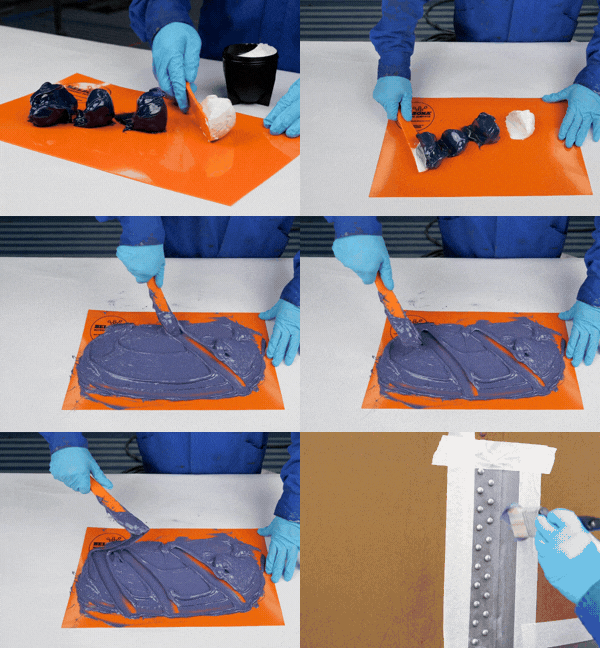
Step 6: Apply Belzona 7311
Wet out the tank substrate using a stiff bristle brush. Firmly apply Belzona 7311 into the repair area. Ensure deep penetration into the surface profile. Make sure to apply the material between the rivets to achieve full contact.
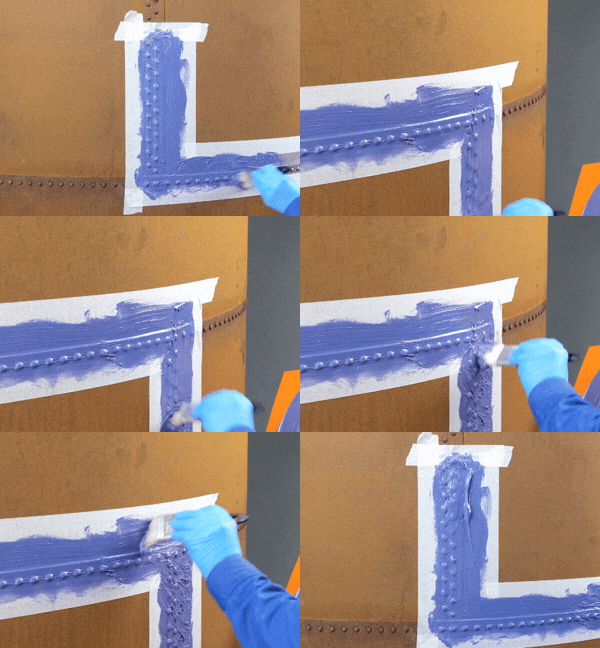
Step 7: Complete the Repair
Whilst the first layer is still wet, apply a further layer of Belzona 7311 to build up the required thickness. Use the Belzona applicator to spread the material over the repair area, then smooth it with the stiff bristle brush.
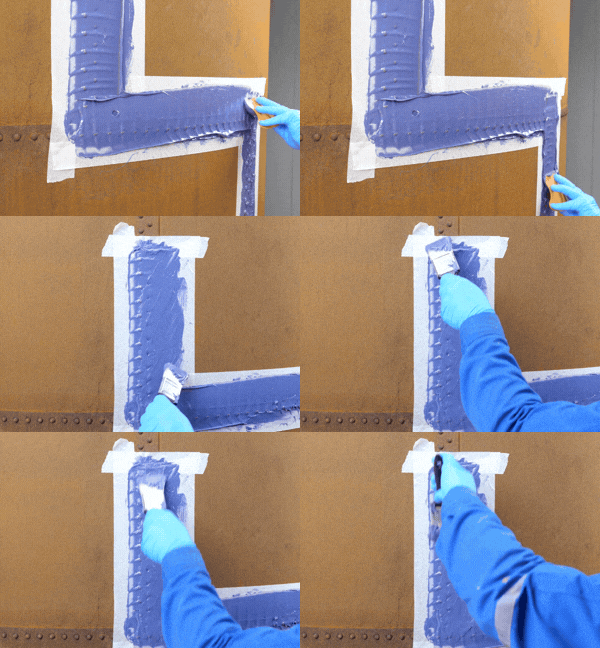
Step 8: Remove the Masking Tape
Once the repair is completed, remove the masking tape and allow the material to cure. For more information about the curing time, consult the manufacturer’s Instructions for Use.
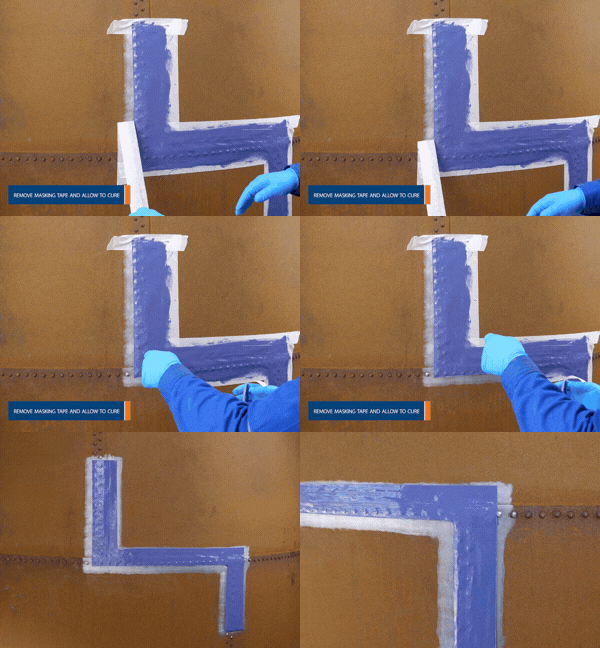
Videos: How to Repair a Riveted Tank Leak with Belzona
Frequently Asked Questions
Does Belzona 7311 hold potable water certification?
No, Belzona 7311 does not hold potable water certification. If the leaking tanks carry potable water, asset owners may consider Belzona 1111 (Super Metal) that is certified for contact with water for domestic purposes as it is certified to NSF/ANSI/CAN 61. For more information, visit the Belzona Distributor finder.
How long does it take for Belzona 7311 to be cured and the tank to be put back in service after application?
The curing time is specified on the manufacturer’s Instructions for Use. Belzona 7311 can also be force-cured using air heaters or heat lamps, for a minimum of one hour at 60 °C (140 °F).
Can I repair the tank leak without having to drain the tank?
Yes, by using Belzona 9611 (ES Metal), you can temporarily stop the leak before applying Belzona 7311 or other paste grade materials to seal the leak for a long-term repair.
How can I calculate the quantity of Belzona 7311 required for a repair?
Coverage rate information is available on the Product Specification Sheet. For the most suitable product recommendation and repair method, contact a Belzona Authorised Distributor in your territory.
What temperatures can Belzona 7311 operate at?
For typical wet and dry service applications the product is suitable for service between -30°C (-22°F) up to 60°C (140°F).
Learn More
- 7 Structural Repair Applications That Don’t Require Welding
- Tank Leak Repair Using Belzona 9611 (ES Metal) and Belzona 1161 (Super UW-Metal)
- Belzona Repair: Sealing Riveted Seams on a Fuel Tank
Want to Learn More About Belzona Tank Leak Repair Solutions?

Marketing and Distributor Support Coordinator at Belzona Limited, based in Bangkok, Thailand
Supawadee coordinates between the Belzona Marketing team and the Distributors across Asia Pacific and the Middle East, supporting local marketing initiatives, event organisation, and content creation for industrial publications. She creates content on industrial asset maintenance, showcasing Belzona solutions tailored to industry needs. She also coordinates major industry exhibitions, including ADIPEC 2025 and OGA 2026, helping distributors showcase Belzona solutions for the energy and industrial sectors.